
-
-
6x AD0003b - Carbon Rod Assembly with Spring sockets
-
12x - FPAN-M3-10L pan-head M3 x 10mm screws
-
6x MSPRING02 - Delta arm tension springs
-
(Optional) 1x ball-stud from the ball-stud bag, for spot check
-
-
-
We pre-assembled the delta rods that came in your beta kit. This leaves all the hard stuff (cutting carbon fiber rods, epoxying, 3D printing) to us. We use a custom jig to ensure that the cups are exactly 270.0 millimeters, center to center.
-
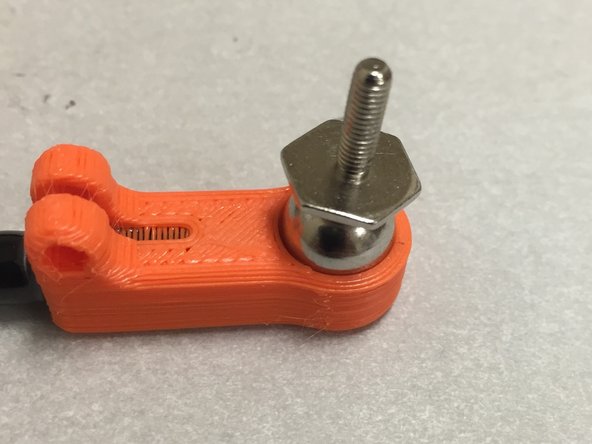
Inspect the ball-cup areas of the orange PLA pieces, on the rods. Ensure that they're round, there are no 3D printing defects. You may use one of the ball-studs as a fit check.
-
Ensure that the epoxy has held and that the carbon rods and 3D printed pieces are secured and don't move.
-
-
-
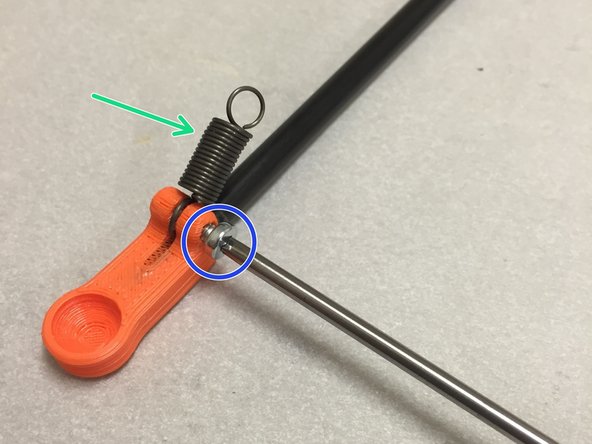
Grab a tension spring.
-
Using M3 x 10mm pan-head screws, attach the tension springs as shown. Do this on both sides for three of the rods.
-
Don't worry if the screws don't have much tension (i.e. they don't feel like they are "screwing in" much). The spring tension on the screw threads will be more than enough to keep the screws from walking out.
-
-
-
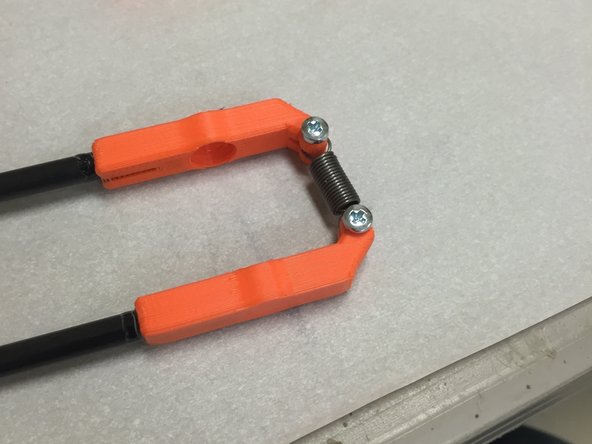
Now take the remaining rods and attach them to the other side of the spring.
-
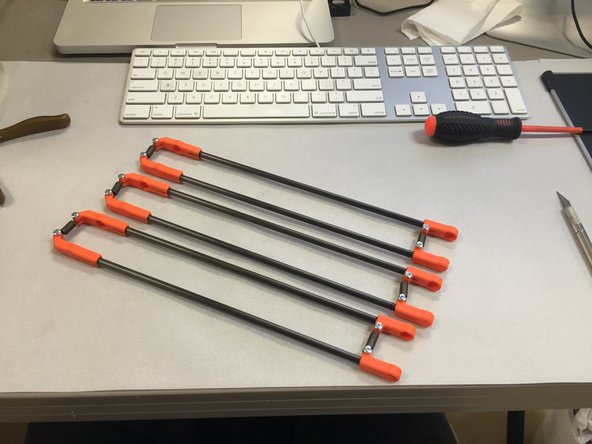
Do this for the remaining rods.
-


Cancel: I did not complete this guide.
7 other people completed this guide.

4 Comments
It seems like the screws holding the springs are unnecessary, and the plastic ends should just be designed with an integrated tab or post to hold the spring ends.
Charles Steinkuehler - Resolved on Release Reply
In step 4 I'm not sure if there's meant to be a nut on the other side? M3x10 cant fit one. But my screw slips in the hole, Adding a bit of super glue, expoxy can fix t his up
You can use longer screws with nuts, or the shorter screws and no nuts. We use them like that, and they hold fine. When they're on the machine, there's way too much tension for them to loosen, even if the screws are loose in the orange plastic hole.