
Introduction
FireStep is an Arduino stepper library for FirePick Delta. FireStep responds to JSON requests written in a flexible query-by-example interaction style inspired by TinyG.
FireStep is designed to work with Pythagorean Hodograph Quintic Curves (PH5Curve), which are smooth, polynomial paths defined by on-path control points. FireStep also implements PHFeed, which controls feed acceleration continuously during path traversal, providing smooth motion.
Although you can send commands directly to FireStep via a USB serial port running at 38400 baud, you will most likely want to use a FireStep driver to generate complex FireStep commands such as the dvs command for traversing 4D strokes.
-
-
Download the official release, which can be found at: https://github.com/firepick1/FireStep/re...
-
Download the zip. When finished downloading, there are two directories in the zip: 'FireStep' and 'libraries'.
-
Place the contents of the 'Libraries' folder into your Arduino libraries folder.
-
Move the FireStep folder to somewhere convenient, like a projects directory under your 'home' directory.
-
-
-
Lots of changes are still being made to this repo. Because of this, there are several branches and forks worth noting here. If in doubt as to which branch or fork to use, please stop by the official FirePick Delta mailing list and ask which one to use... Or just use the released version.
-
The official FireStep repository is at: https://github.com/firepick1/FireStep .. This official repository is on the personal account of Karl Lew.
-
The FirePick Delta project has a fork of this repo, located at: https://github.com/firepick-delta/FireSt... .. From time to time, our repo may have bleeding-edge changes not yet integrated into Karl's official repo.
-
To sync to one of these bleeding-edge repos, simply find the 'git clone url' on the github page(s) linked above, clone them in your favorite git client, and switch to whatever branch is desired.
-
-
-
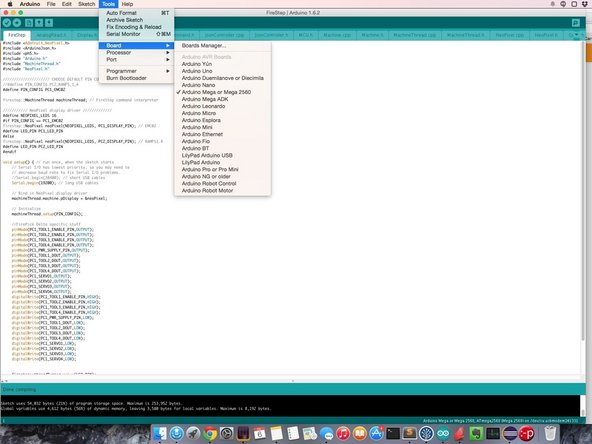
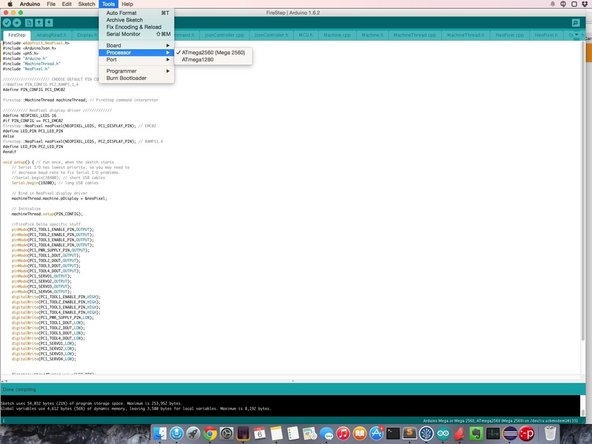
Set the processor type to 2560. It's very uncommon for this to be set to 1280.
-
-
-
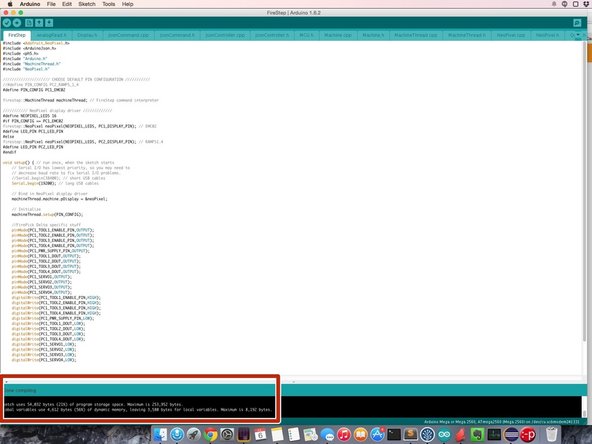
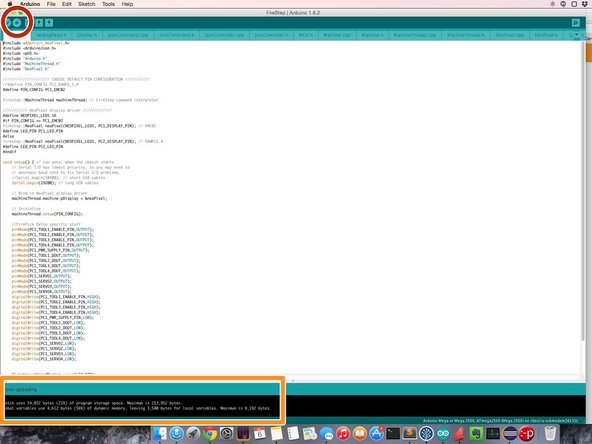
In the Arduino IDE, click the 'Compile' button. Wait for the status window to indicate whether the build was successful or failed.
-
-
-
Connect the Arduino to the PC's USB port.
-
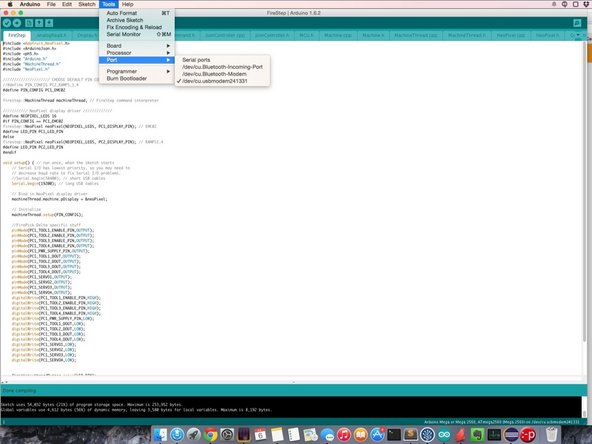
In the Arduino IDE, select the correct COM port as shown.
-
-
-
Upload to the Arduino.
-
Wait for the status to indicate whether the upload succeeded or failed.
-
-
-
Precautionary measure! Note that from here on out in this tutorial, these steps are optional, but encouraged for those that don't want to risk damaging anything.
-
The OpenPnP driver for FireStep is quite stable and if you jump right into OpenPnP, you can skip this step and the rest of the steps in this guide.
-
If you would like to continue, remove the belts on your delta mechanism. You may do this by cutting and removing the cable ties that act as tensioning mechanisms. Then move the pulley up and down while moving the belt to one side of the pulley. It should slip right off.
-
-
-
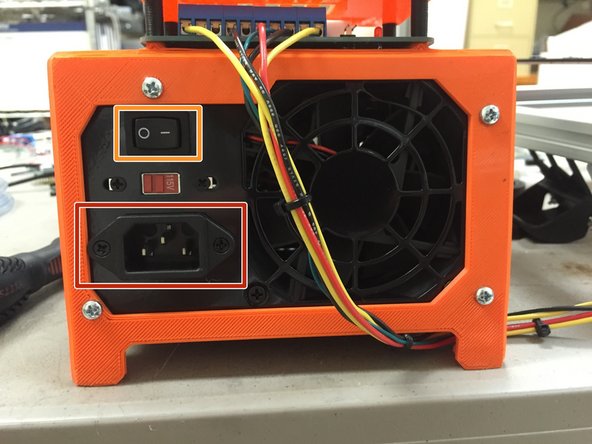
Make sure the power supply is plugged in
-
Jumper the ATX power supply to ON
-
Turn the ATX power supply switch on
-
-
-
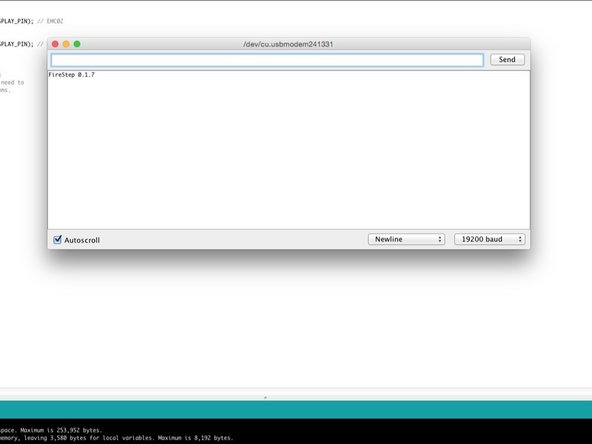
Open the Arduino serial window. Set the baud rate to '19200' and the line ending to 'newline'. You should see FireStep initialize (it will print "Firestep 0.1.7' or whatever the version number is).
-
Make sure your belts are disconnected, and send the following command to the Arduino serial window:
-
{"tstph":{"mv":20000,"tv":0.35,"pu":32000}}
-
X, Y, and Z motors should spin. If so, congratulations, you have successfully loaded FireStep.
-
You may put your belts back on (remember to re-install the zip-ties and tighten, before continuing).
-
Next, you will want to get OpenPnP working with the FireStepDriver.
-
-
-
You should already have OpenPnP installed, if you're doing these guides in the recommended order.
-
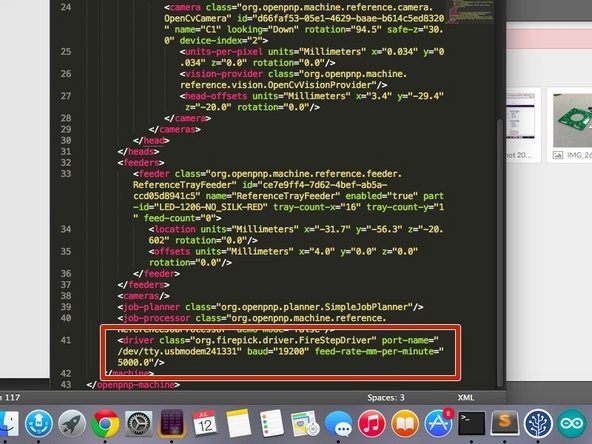
Run OpenPnP, go to the settings tree, and select FireStepDriver from the list.
-
Alternatively, you can manually edit the machine.xml file which is described in this guide.
-
Cancel: I did not complete this guide.
One other person completed this guide.
